
How to Turn a Daytime Real Estate Photo Into Dusk (Step by Step)
Follow a real RePhoto workflow to turn a daytime exterior into a realistic twilight listing photo, from upload and AI suggestions to review and download.

In this tutorial11 sections
Video walkthrough
Watch the complete tutorial
See the real RePhoto workflow from upload through the final before-and-after comparison. The illustrated instructions and quality checklist continue directly below the video.

A day-to-dusk conversion turns an ordinary daytime exterior into a twilight listing image with a colorful evening sky and warm interior light. This guide documents a real RePhoto run from start to finish: no mock interface and no pre-made after image.
Quick answer: upload a daytime exterior, wait for RePhoto's AI suggestions, choose Twilight Presentation, set the sky type to Twilight, generate, review, and download. Applying the enhancement uses one credit.
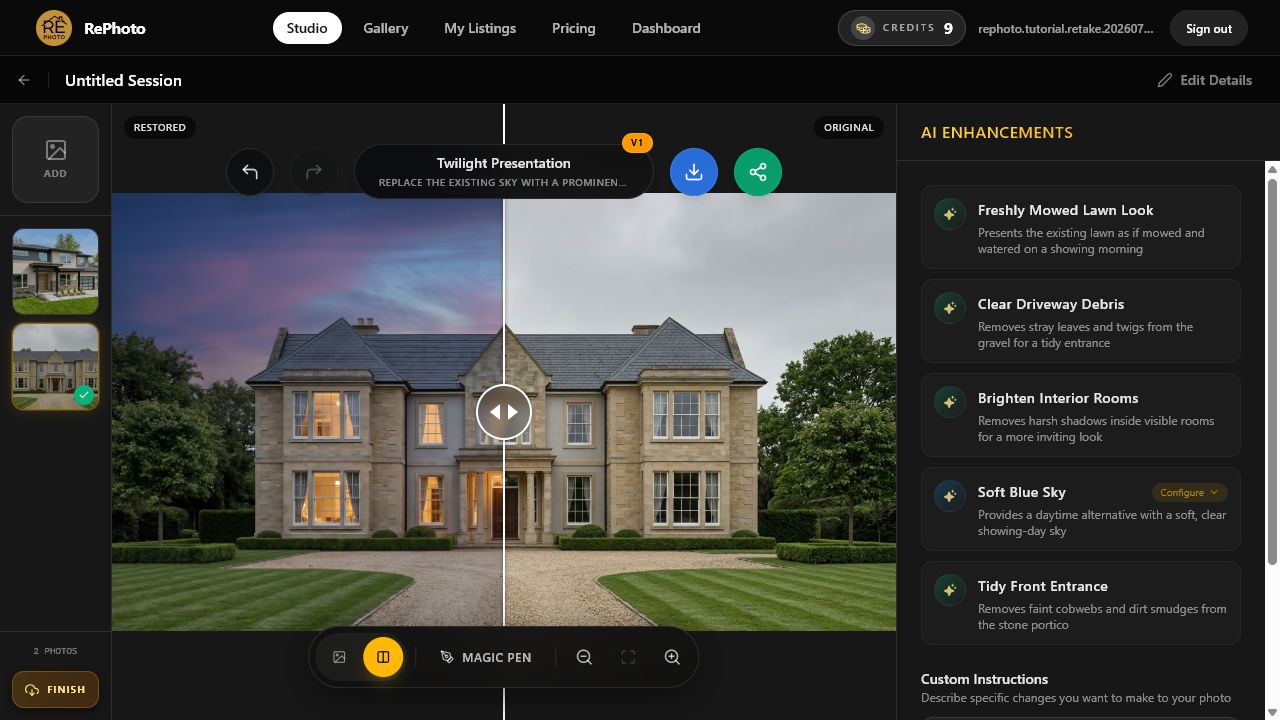
Before you start: choose the right exterior photo
Start with a sharp, well-composed exterior where the roofline, windows, landscaping, and a useful portion of the sky are visible. A straight-on or three-quarter view works well. Avoid images with severe motion blur, blocked windows, or a building that is already almost black.
- Use the highest-resolution original available.
- Keep vertical lines straight and the building clearly exposed.
- Include enough sky for the twilight color to read naturally.
- Prefer a photo where several windows are visible.
Step 1: Create an account or sign in
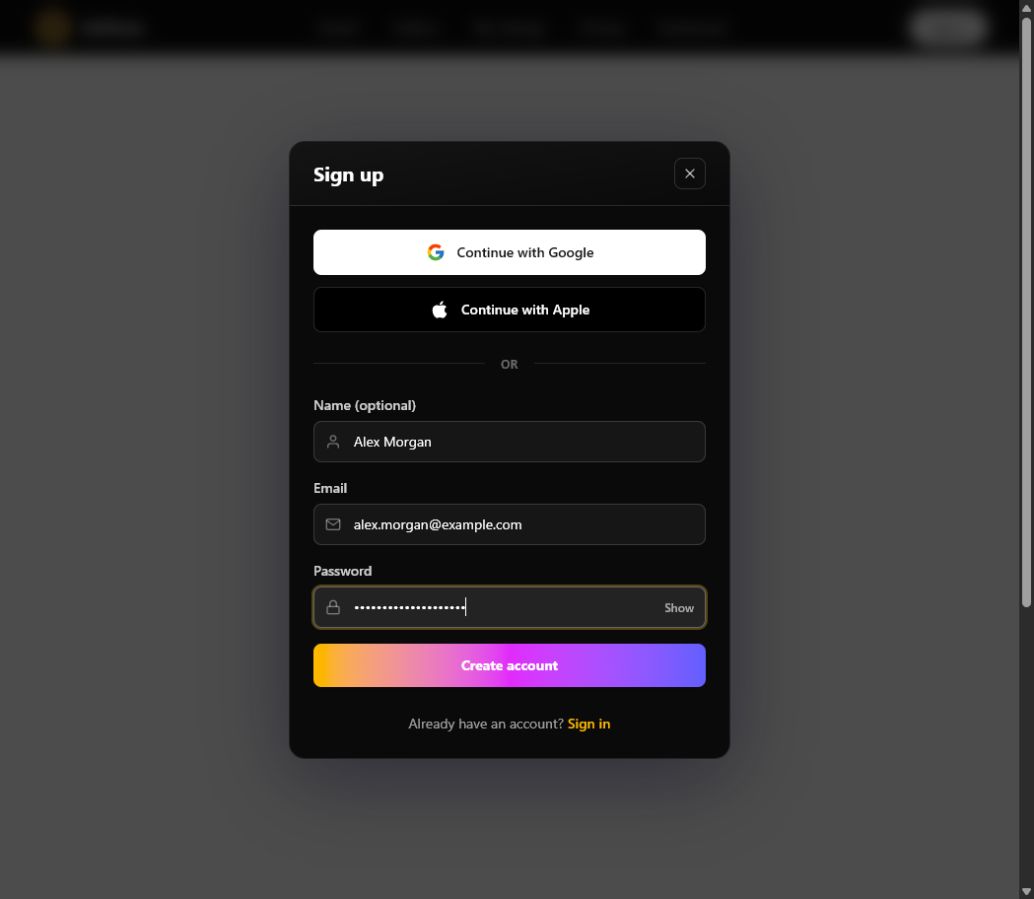
Open RePhoto Studio. Create an account with email and password, or continue with Google or Apple. New accounts can start with free credits, so no payment details are required for the first test.
Step 2: Upload your daytime exterior
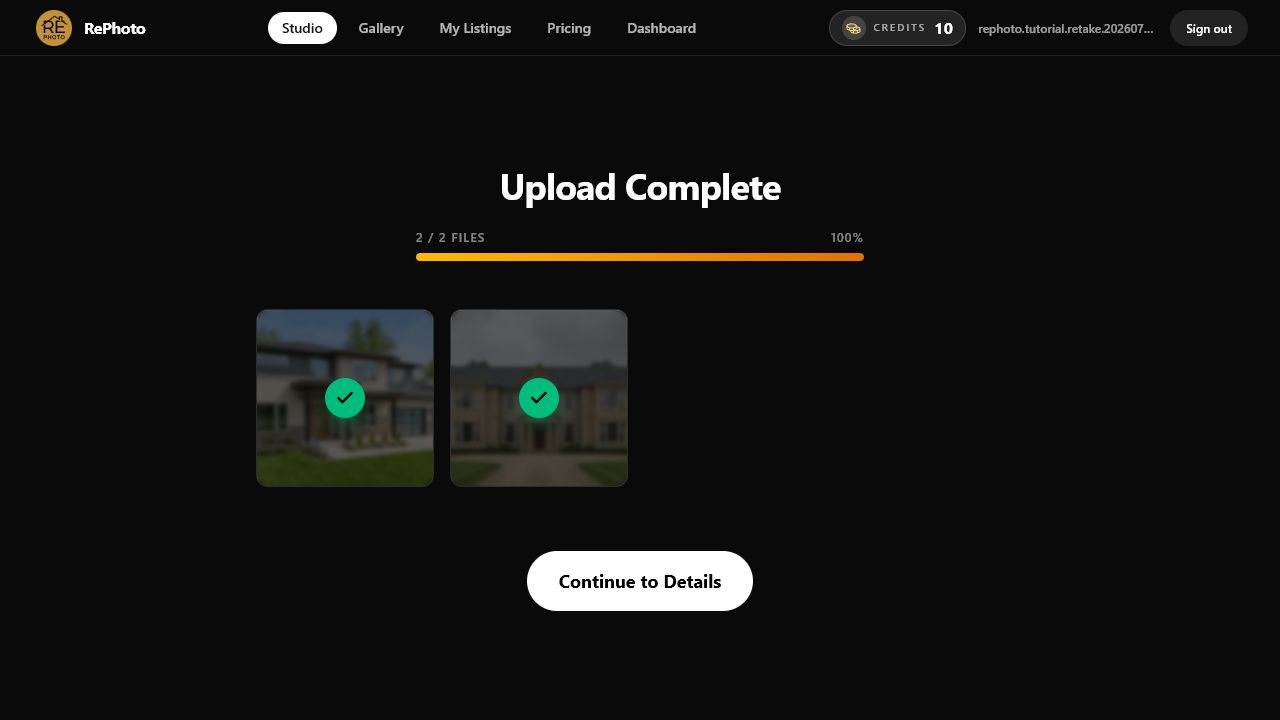
Select Select Files, then choose the exterior photo you want to convert. RePhoto accepts JPG, PNG, and WebP files. You can upload a single hero image or a batch from the same property.

Step 3: Wait for the upload to finish
Do not leave the page while the upload is running. When every thumbnail shows a green check and the progress bar reaches 100%, continue into the editor. RePhoto then analyzes each photo and prepares context-aware enhancement suggestions.
Step 4: Choose Twilight Presentation
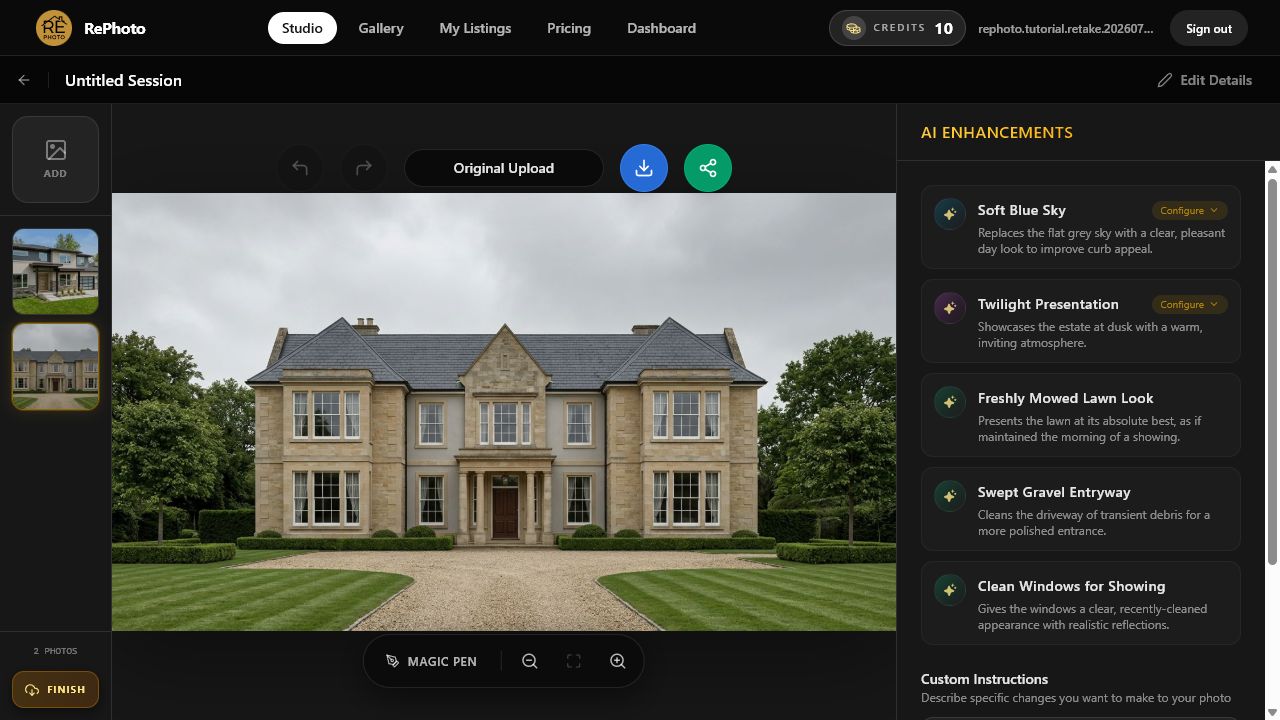
Wait for the AI Enhancements panel to populate. The available suggestions depend on what RePhoto sees in the photo. For this exterior, it identified Twilight Presentation, described as a dusk treatment with warm interior lighting and a sunset sky. Select that suggestion.
Step 5: Set Sky Type to Twilight and generate
Open the suggestion's settings and select Twilight as the sky type. Then choose Generate with settings. Other sky options can produce a different mood, but Twilight is the most direct choice for a classic virtual-twilight listing photo.
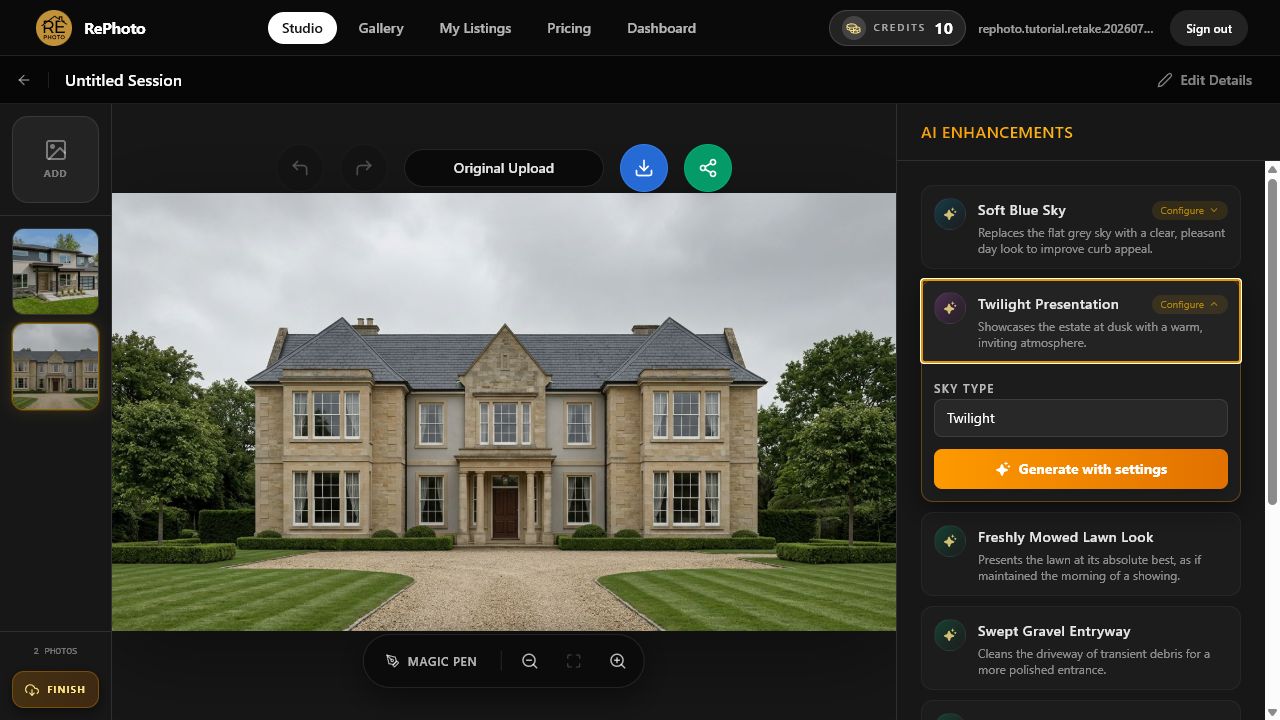
RePhoto now creates the new image. Keep the editor open while it is processing. Generation time varies with image size and model demand.
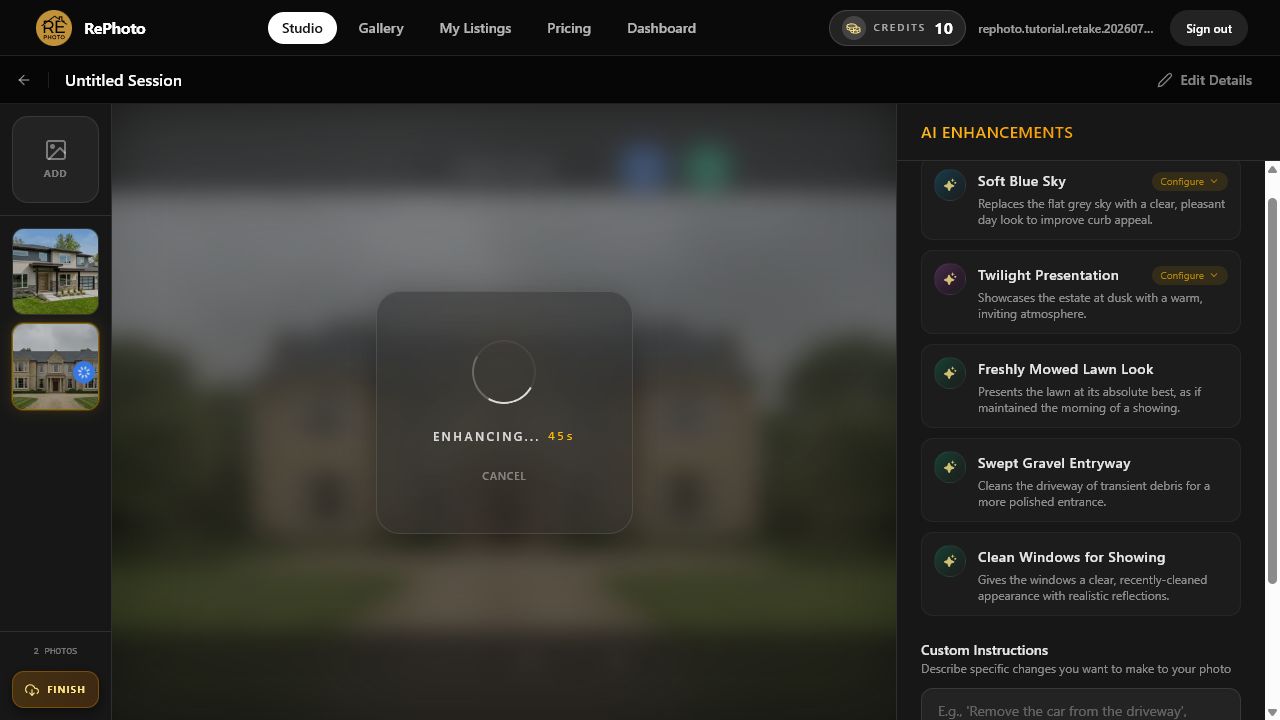
Step 6: Review the generated twilight image
The first result opens in Review Generation. Inspect the roofline, facade, windows, driveway, and landscaping before accepting it. The transformation should change the time of day without redesigning the property.
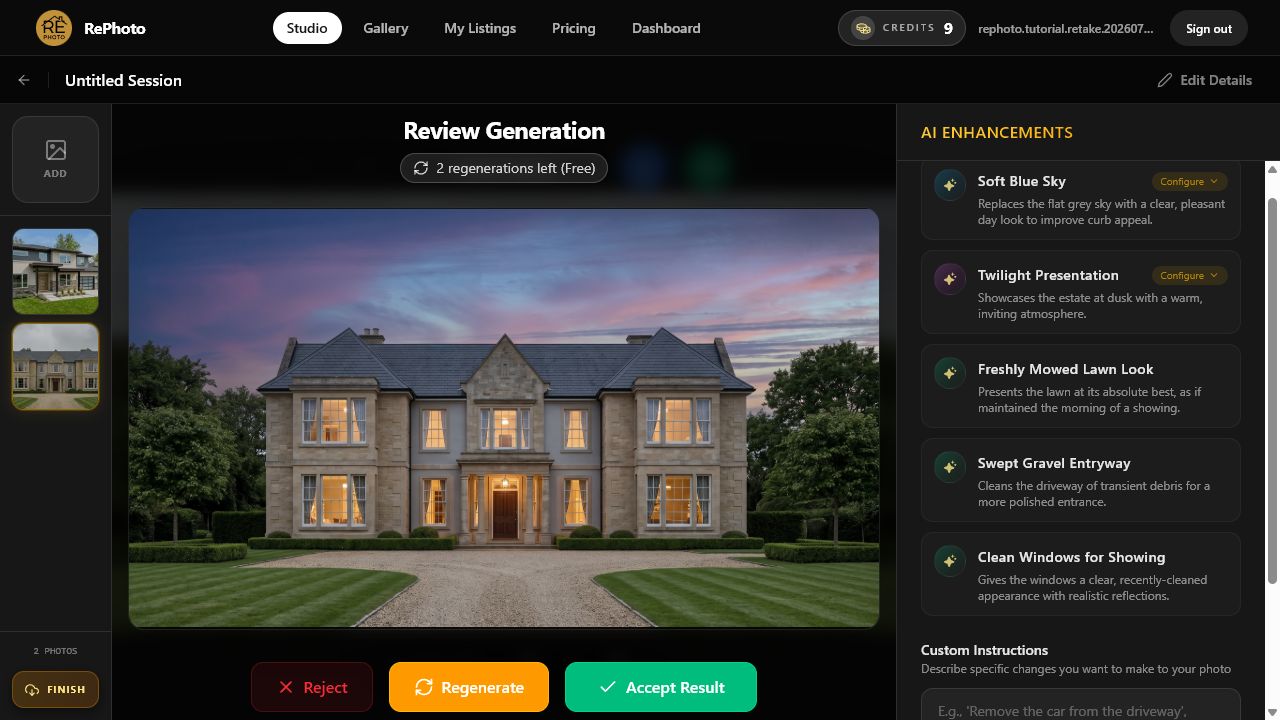
Choose Accept Result when the edit looks natural. If it needs another pass, use Regenerate; the editor displays how many regenerations remain. Use Reject to discard the proposed version.
Step 7: Compare the result and download
After accepting, drag the before-and-after slider across the image. Look for realistic window light, clean transitions around trees and rooflines, and consistent detail in stone, siding, and landscaping. Use the blue download button when you are satisfied.
Quality checklist for a believable day-to-dusk edit
- The building's shape, windows, doors, and materials are unchanged.
- The sunset direction and brightness feel consistent across the sky.
- Interior light is warm but not blown out or identical in every window.
- Trees and the roofline do not show halos or cutout edges.
- The lawn and driveway retain useful detail instead of turning black.
Treat virtual twilight as presentation, not permission to misrepresent the property. Follow your MLS and local disclosure rules, especially if an edit could imply fixtures or permanent lighting that do not exist.
Frequently asked questions
What is a virtual twilight photo?
It is a daytime exterior photo edited to look as though it was captured around dusk. The typical changes are a twilight sky, warmer windows, and balanced evening exposure while preserving the property itself.
Do I need to write a prompt?
Not for this workflow. When RePhoto detects a suitable exterior, the Twilight Presentation appears as a configurable suggestion. You choose the sky type and generate from the interface.
Can I try another version?
Yes. The review screen includes a Regenerate option and shows the number of remaining regenerations for that result.
Which photo should become the twilight hero image?
Usually the strongest front exterior: a wide, level composition with a clear roofline, visible windows, attractive landscaping, and enough sky to establish the evening mood.
Next step
Try the same workflow with your current lead exterior in RePhoto Studio, or compare more examples in the before-and-after gallery. For the strategy behind choosing twilight as a listing image, read our guide to making MLS photos stand out with day-to-dusk conversion.